Painting cabinetry is a quick and cost-effective way to give your kitchen or bathroom a dramatic makeover. It requires a little time, but the results are worth it.
Unlike refacing, cabinet painting is less expensive and leaves you more options for a final look. Start with a high-quality primer like KILZ 3 PREMIUM Primer, which has mildew resistance for moisture-prone areas. Contact Cabinet Painting Sacramento for professional help.
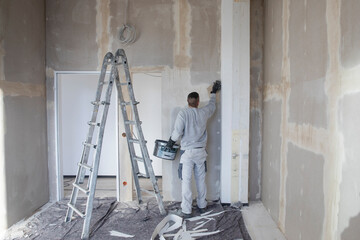
Surface preparation is the various methods used to treat a metal surface prior to coating, lining, bonding, welding or assembly. The process removes existing layers of paint, mill scale, corrosion and other dirt and provides the basis for a long-lasting adhesive layer. There are many different approaches to this task, from mechanical abrasives to chemical treatments and laser technology. This is an extremely important step since it has been shown that a high percentage of material failures in these topical products can be traced back to improper surface preparation.
The most commonly used method is blasting, where the object to be coated is blasted with air under pressure through loose abrasive grains, usually sand. This is particularly effective on rust and other corrosion problems, but it also creates a profile on the surface, which will provide better adhesion. This is especially critical for some coatings that depend on a certain surface texture for their performance.
After the removal of the old layers, the surface should be thoroughly cleaned to remove any remaining debris. This includes the abrasive dust generated by mechanical abrasives, as well as any contaminants left behind by previous chemical processes. The surface may also require conditioning, which is achieved using methods like laser texturing or chemical treatments that alter the chemistry of the metal. This helps improve bonding by introducing oxides that provide more bonding sites for the coating or adhesive.
These techniques should be carried out by trained and certified personnel to ensure the highest quality results. Additionally, they must follow strict environmental protocols to avoid any contamination of the surrounding areas. Some chemical preparations may even require extended processing times and rinsing to eliminate any residual chemicals.
Finally, the new coating must dry completely before it is applied. This is an extremely important step since any moisture can cause it to blister, peel or flake. After all, it is a highly engineered product that must be able to stand up to harsh and unrelenting environments for years to come. Taking the time to properly prepare the surface will help the coating last for as long as possible.
Primer
Painting cabinets is a cost-effective way to upgrade your kitchen without the expense of a major renovation. In addition to providing a fresh new color, the process can also make your cabinets more durable and easier to clean. However, the success of a cabinet painting project hinges on properly preparing the existing surface and applying the right primer. Primer ensures paint adhesion, blocks stains, and creates a smooth surface. There are several types of primer available, and the best one for your project depends on the material and condition of your cabinets.
A primer’s primary function is to act as a chemical barrier between the surface and any subsequent layers of paint. The goal is to prevent any moisture from absorbing into the substrate and causing peeling, cracking, or other damage. Primer is also used to fill in any imperfections or flaws on the existing surface, creating a smooth canvas for your finishing coats.
For new surfaces or bare wood, water-based primers such as KILZ 2 All-Purpose Primer are an excellent choice. They are non-toxic, low-odor, and work well on most surfaces including laminate. However, if your cabinets have existing paint, it’s recommended that you use an oil-based or shellac-based primer. These primers offer superior stain-blocking and adhesion.
If you’re working with a previously painted or glossy finish, lightly scuff sand the surface to help your primer and paint adhere. A light pass with 150 or 180 grit sandpaper will remove the sheen and provide a good bond. After sanding, wipe down the cabinets with a damp cloth to remove any dust and residue.
Whether you’re painting over a light or dark shade, a primer with strong stain-blocking properties is essential. If you’re painting over a dark color, try Zinsser Cover Stain Oil-Based Primer to protect against tannin bleed-through. If you’re working with a glossy finish, a high-performance slicker primer such as BIN Shellac Primer is the way to go. It bonds well to slick surfaces, blocks stains, and is compatible with both water-based and oil-based topcoats. It’s also safe for use around sensitive materials such as wood and glass.
Paint
Painting cabinets is a simple way to upgrade their appearance and give your kitchen a fresh look without spending a lot of money. However, it is important to understand what you’re getting into before you get started. If you’re not prepared for the project, it can be difficult and time consuming. Also, the process can result in chipping and peeling if it isn’t done properly.
It is a good idea to hire professional painters to avoid the hassle and get the job done right. They can help you choose the best color and finish for your cabinet doors, and make sure it looks great in your kitchen. They can even help you choose new hardware to go with your new paint!
The type of paint used is another important factor. Acrylic and alkyd paints are durable, easy to apply, and flexible enough to resist scratches and dents. They also provide protection from mold, mildew, and moisture damage. However, they are harder to clean and emit strong odors during application.
Oil-based paints are also a popular choice for cabinet painting, but they require more maintenance and cleaning than latex paints. They have a smooth finish, dry quickly, and can withstand heavy use, but they can be difficult to clean, require lengthy dry times between coats, and are more susceptible to fading from sunlight exposure.
Another option is to use a water-based alkyd enamel, which is similar to oil-based paint but has fewer odors and dry faster. It also dries tougher and resists chips, dents, and moisture damage better than acrylic paint.
You can also use a hybrid alkyd enamel paint, which is water-based but has an alkyd base that is similar to oil paints. This option has a smooth finish, drys quickly, and is easily cleaned with soap and water.
Whatever finish you decide to use, it is important to prime the surface before applying your paint. This helps block stains and prevent mold and mildew growth, and promotes adhesion. To ensure the best results, you should also use a high-quality brush or sprayer. A contactless sprayer is usually the best choice for cabinet painting, as it won’t leave roller texture or brush marks and will allow you to apply thin, consistent layers.
Finish
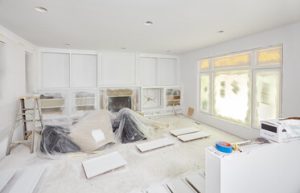
Cabinet Painting is a great way to upgrade the look of your kitchen without a full remodel. It’s more cost-effective than refacing your cabinets and can give you a furniture-like finish that will last much longer. However, it can be a more labor-intensive project than refacing, as it requires thorough prep work and multiple coats of paint to get the desired result.
The first step in the cabinet painting process is choosing your color scheme. You’ll want to consider the overall feel of your kitchen and choose a color that best fits. For example, do you want a crisp, clean modern look or an English cottage aesthetic? Once you’ve chosen your color, you can move on to picking the paint finish. There are 4 main choices: flat, eggshell, semi-gloss, and gloss. Read our guide on Choosing The Perfect Paint Finish to learn more about the different options.
Next, you’ll need to select a high-quality paint that is designed for cabinets. This will ensure that the paint adheres to the surface and holds up to wear and tear. It’s also important to test the paint on a hidden area of your cabinet before applying it.
Once the primer is dry, it’s time to start painting! It’s a good idea to begin with the backside of the cabinet door, as this will prevent any mishaps from showing on the front. Once the back side is painted, flip the door over and begin painting any detailed areas. Continue this process until the whole cabinet is covered with a smooth, even coat of paint.
When the cabinet painting is complete, allow it to dry completely before reassembling. This will take a few days, but it’s worth the wait! Once everything is reassembled, be sure to remove all of the painter’s tape and drop cloths. Then, touch up any areas with extra paint and enjoy your newly upgraded kitchen!
Cabinet painting is not a simple task and it takes time to complete correctly. It involves sanding and priming to prepare the surfaces, as well as multiple coats of paint. When not done correctly, the results can be sloppy and may not stand up to the test of time. If you’re looking for a more professional result, consider hiring a professional to do the job.